Want to turn a review lesson into an interactive classroom activity? A live Blooket game lets you lead the session from your screen while students answer questions on their own devices. Once you have a question set ready, you can choose a game mode, adjust a few settings, and invite your class with a Game ID, QR code, or join link.
This guide walks through the full Blooket host game process, from choosing a question set to starting the live session. It also explains the settings that matter most and what students need to join.
What You Need Before Hosting
Before you start, make sure you have these basics ready:
- A computer with an internet connection
- A Blooket account
- A question set from My Sets or Discover
- At least one player with an internet-connected device
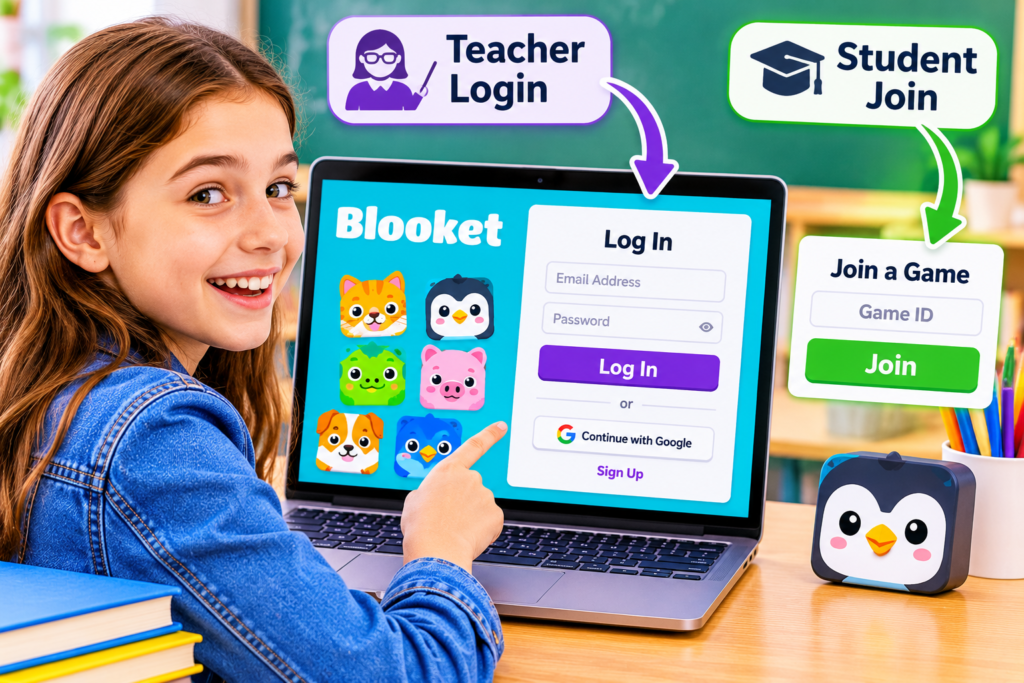
The teacher or host needs a Blooket account, but students do not need accounts to participate in a Live Game. They can join as players using the code, QR code, or link you share.
Step 1: Sign In to Blooket
Open Blooket and sign in to your account. If you have trouble accessing your account, use our Blooket login guide for help with the sign-in process.
After signing in, you can choose a set you have already created or find a public question set in Discover.
Step 2: Choose and Review a Question Set
Your question set provides the questions students will answer during the game. To select one:
- Open My Sets if you want to use one of your own question sets.
- Choose Discover to browse public sets made by other users.
- Select the set you want to use to open its preview page.
- Choose Show Answers to review the questions and answers before the game.
- Select Host when you are ready to continue.
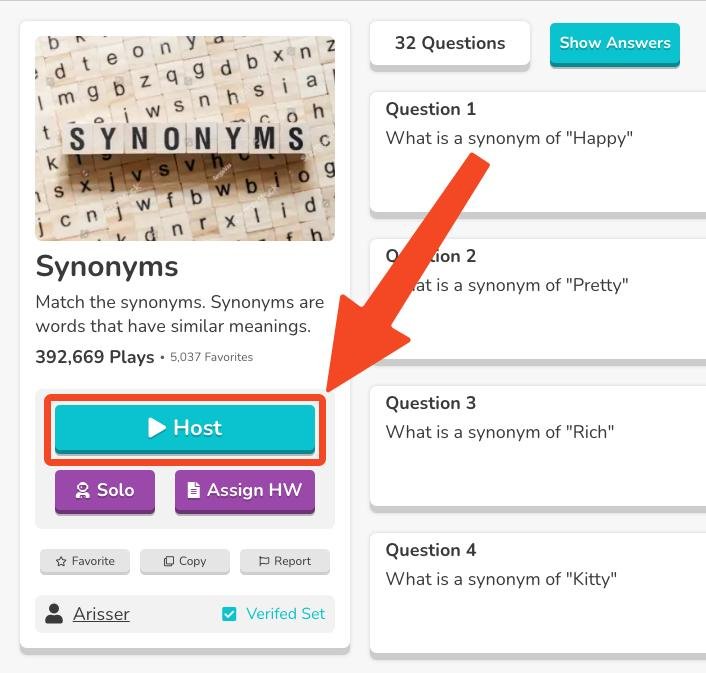
Take a moment to check that the questions match your lesson, grade level, and students’ current knowledge. Reviewing the answers first can help you catch an unsuitable or inaccurate set before the class joins.
Step 3: Select a Live Game Mode
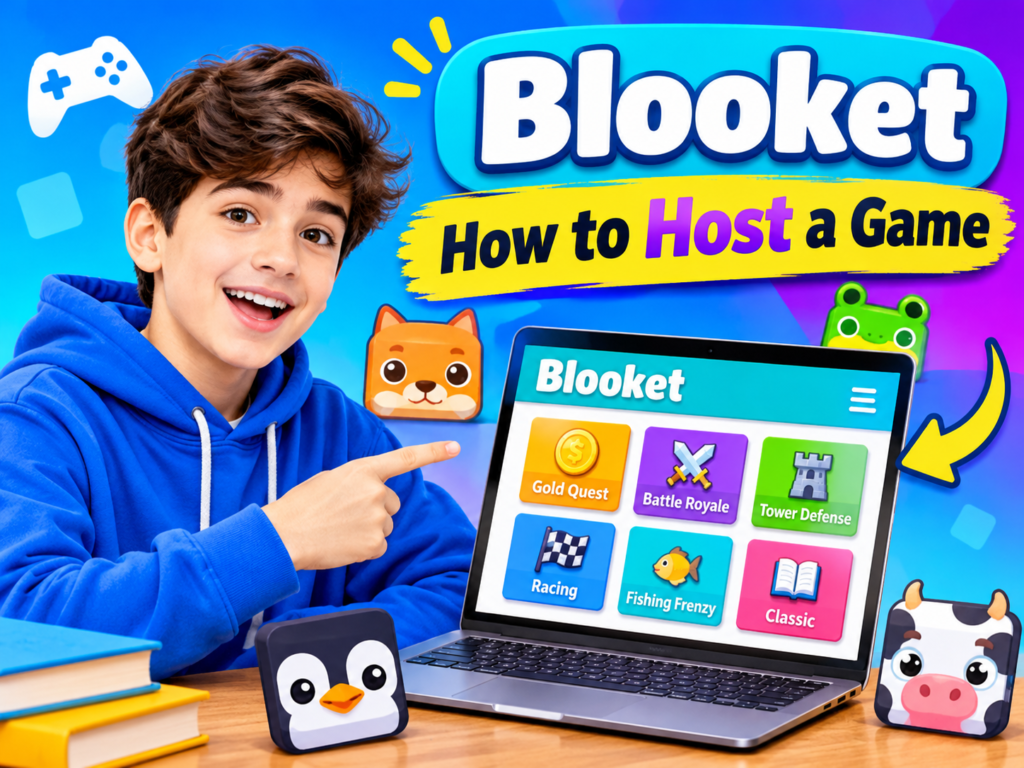
After selecting Host, Blooket displays the game modes available for hosting. Choose one that suits your activity and class. Select a mode to read its description and review its player recommendations before moving on.
Not every mode is available for every type of play. Some modes may be limited to Solo or Homework, and the options shown can depend on your account. Make sure the mode you select supports Live hosting.
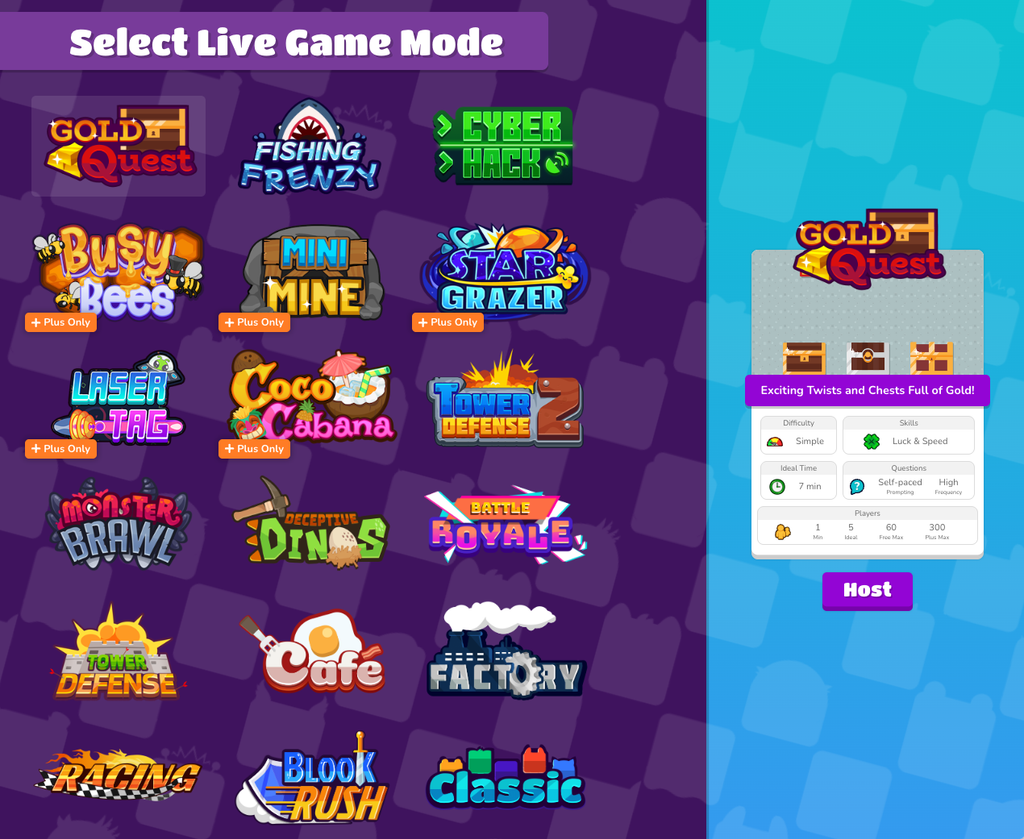
Once you have chosen a suitable live mode, select Host on its mode page to open the host settings.
Step 4: Adjust the Host Settings
The settings screen controls how the live game runs. Available options can vary by game mode, so you may not see every setting in every game.
| Setting | What it controls |
| Time | Ends the game after the selected amount of time has passed. |
| Goal | Ends the game when a player reaches the selected score goal. |
| Show Answer Correctness | Shows the correct answer after a player answers incorrectly. |
| Time Penalty for Incorrects | Sets how long players must wait after an incorrect answer before answering the next question. |
| Question Ordering | Choose Random to shuffle questions, Ordered to follow the set order, or Mastery to bring up questions answered incorrectly more often. |
| Allow Late Joining | Lets players enter after the game has already started. |
| Use Random Names | Assigns generated names instead of allowing students to enter their own names. |
| Mute Player Sounds | Mutes gameplay sound effects for all players. |
| Allow Student Accounts | Controls whether students see account-creation options; Blooket recommends leaving this enabled. |
| Banned Blooks | Prevents players from selecting Blooks chosen by the host. |
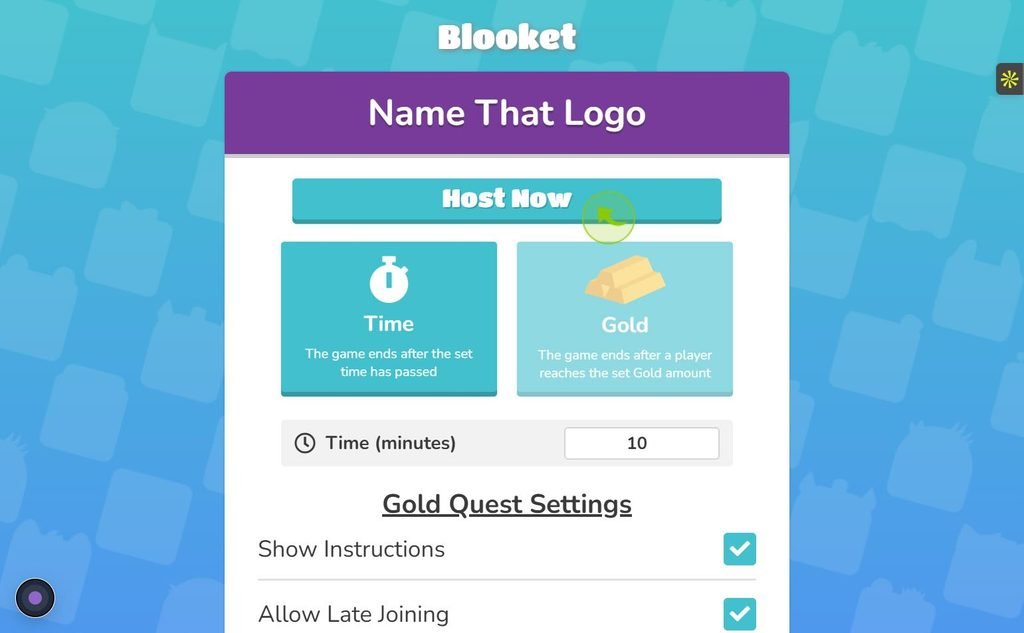
For a classroom review, consider whether you want students to use their own names or random names. Blooket suggests using initials or first names when you want post-game reports to be easier to understand. If students may arrive late, check Allow Late Joining before you launch.
When the settings look right, select Host Now.
Step 5: Share the Game ID, QR Code, or Join Link
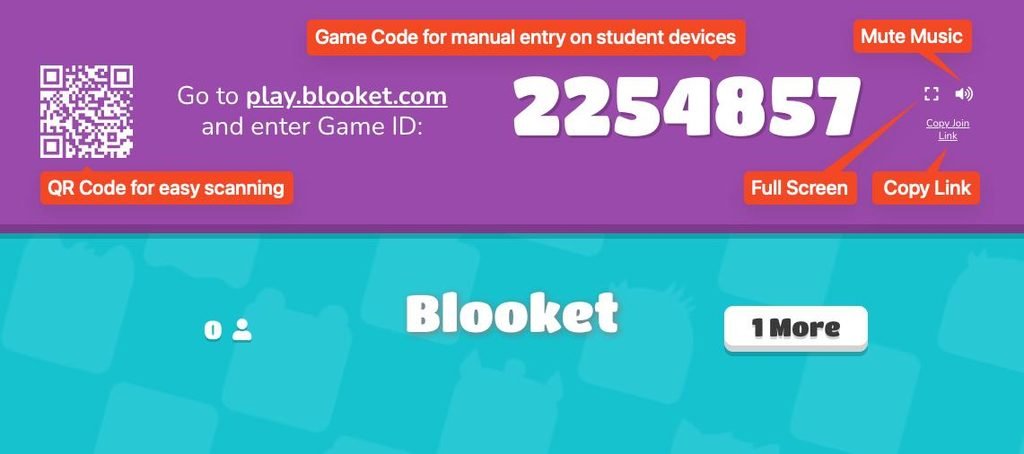
Blooket opens a lobby screen after you select Host Now. Keep this screen visible so students can see the joining options. In a physical classroom, display it on a projector or shared screen. For remote learning, share your host screen through your video-meeting platform.
Students can join in three ways:
- Game ID: Students visit play.blooket.com and enter the Game ID shown on your host screen.
- QR code: Students scan the displayed QR code with a compatible device.
- Join Link: Copy the link and share it through your classroom platform, email, or class chat.
Students then enter a name or receive a random one, and choose a Blook while they wait in the lobby. If you need a student-facing walkthrough, send them our
guide to joining a Blooket game with a code.
Step 6: Check the Lobby and Start the Game
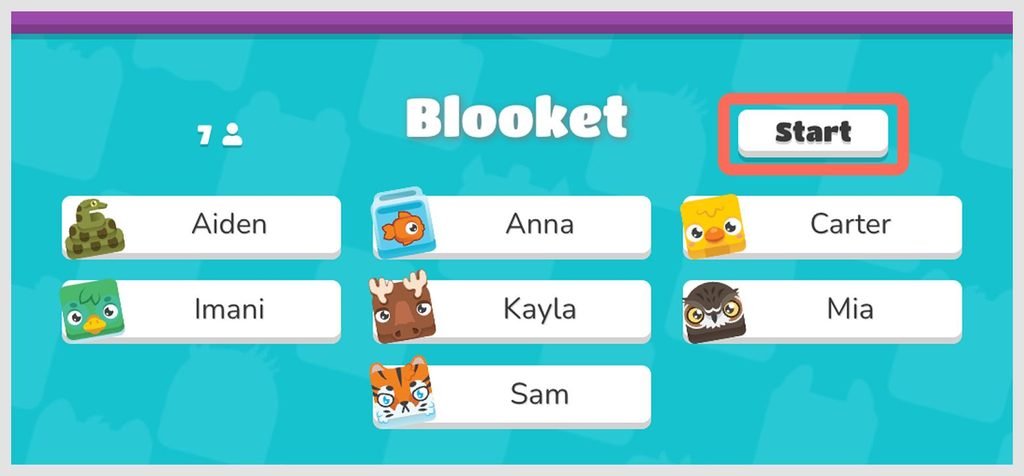
Watch the lobby as students join. Check that the expected players have entered and that the class is ready. When you are ready to begin, select Start on the host screen.
If you enabled Allow Late Joining, students may still be able to enter after the game begins. Otherwise, make sure everyone who needs to participate has joined before starting.
Tips for a Smooth Blooket Hosting Session
- Preview the question set before class so you know the questions and answers are appropriate.
- Choose a game mode that fits the time available and the type of review you are running.
- Test your classroom display or screen-sharing setup before students arrive.
- Share the QR code or join link if typing a Game ID would slow students down.
- Decide whether student names or random names are better for your classroom.
- Enable late joining if students may connect after the session starts.
Common Blooket Hosting Problems
The Host button or a game mode is missing
Check that you opened a question set and selected a mode that supports Live play. Some modes are only available for Solo or Homework, and available modes can depend on your account.
Students cannot join with the Game ID
Ask students to check that they are using the current Game ID displayed on your lobby screen and entering it at play.blooket.com. You can also share the QR code or Join Link as an alternative.
A student joined late
If you want late arrivals to enter after the game starts, enable Allow Late Joining in the host settings before selecting Host Now.
Students think they need an account
A Blooket account is not required to participate in a Live Game. Students can join using the Game ID, QR code, or Join Link. They may sign in if they want to use their own account features.
Frequently Asked Questions
Can I host a Blooket game for free?
Blooket’s official hosting guide lists a Blooket account as a requirement. Check the current options and limits shown in your account, because availability can vary by game mode and account.
Do students need a Blooket account to join?
No. Students do not need an account to participate in Live Games. They can join using the Game ID, QR code, or Join Link.
Where do students enter a Blooket Game ID?
Students go to play.blooket.com and enter the Game ID shown on the host screen.
Can students join a Blooket game with a QR code?
Yes. Students can scan the QR code displayed in the game lobby with a compatible device.
Can students join after the game starts?
They can if Allow Late Joining is enabled in the host settings for that game.
Why can’t I find the game mode I want?
Some game modes support only Solo or Homework play, and available modes may depend on your account. Check the mode description to confirm that it supports Live hosting.
Final Checklist Before You Host
- You are signed in to your Blooket account.
- You have selected and previewed the correct question set.
- You have chosen a Live game mode.
- You have reviewed the host settings.
- Your Game ID, QR code, or Join Link is visible or ready to share.
- Students are in the lobby before you select Start.
For Blooket’s current step-by-step instructions, see the official Blooket guide to hosting a game.